I was working on one of my personal projects and I thought that it would be really cool if I have my own source control mechanism so I can always rollback to older versions if I ever need to do it. Till now, I was always just keep multiple copies of each project so if I have to rollback or even just have to compare files then I just open them up and compare it. But with my prolonged exposure to SVN, I found that it is more easy if I have some sort of source control server, I can use it to keep all of my repositories and it will make my like more easy. So just last night I finally completed that task.
Tools of trade,
- Visual SVN Server (to work as SVN Server, free)
- AnkhSVN (a Visual Studio plugin for SVN, free)
- Tortoise SVN (tool to use SVN in windows environment, free)
To setup dedicated Visual SVN Server I used virtual machine with Windows 2008 Server (having 16 Gigs of RAM really helps ![]() ). Just make sure that machine has static IP, because DHCP will have random IP of machine and then it could be wonky for SVN Server.
). Just make sure that machine has static IP, because DHCP will have random IP of machine and then it could be wonky for SVN Server.
 |
 |
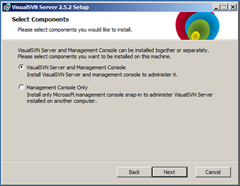
After accepting EULA, first option on screen is to select type of installation. You can either install just management console or whole application. Since I wanted to install server too I selected first option.
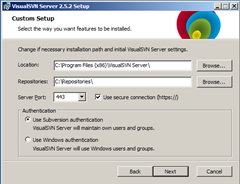
Next screen is to select where you want to install SVN and what will be location of Repository. Since this will be dedicated SVN server for me, I really don’t want to locate it to some other location. This screen also let you select port number and type of authentication. If you select checkbox for “use secure connection” it will actually create security certificate for you (which is really nice feature). I also choose to use subversion authentication since I don’t have domain setup, I don’t want to get crazy with permissions and other stuff.
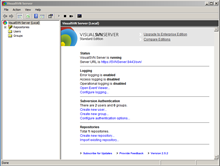
And that’s it !! Installation process is very very straight forward and easy. Once setup is done you will have your SVN server ready to use.
 |
 |
 |
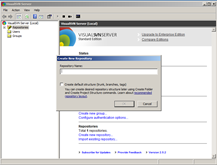
Configuring repositories is also very easy. Just open up Visual SVN Server management console and right click on “Repositories” and create new repository. Just give any name to it and if you want to create proper repository structure then just check “create default structure”.
Next step is to create some users who will have access to this repo. Since we selected “Suberversion Authentication”, just right click on “Users” and create new user. Add username and password. This will create a user.
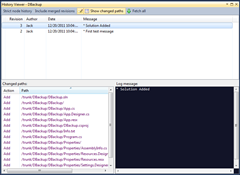
To use SVN for source control in Visual Studio we need a plugin called AnkhSVN. Just download it from here. Once installed, just create a repository into SVN Server and add project to that repo (by right click –> add selected project to subversion) and just provide URL for repository.
 |
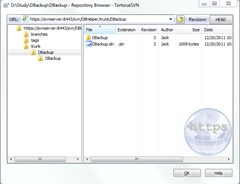 |
To use source control in windows download Tortoise SVN from here and install it. Then just right click on any place you want to check out.
That’s it. It’s really simple to setup your personal version control system. And believe me it is really helpful when you have more than few personal projects to work on ![]() …
…
It’s Just A Thought … ![]()
