Containers and Docker has always been bit mystery to me and I wanted to learn more about them forever. And when I got my new NAS, I finally decided to dive head on. Since then, I have discovered whole new side of technology and my homelab is more complex now :D.
During my last try, I setup Portainer-CE in my QNAP Container Station. Mainly because though QNAP Container Station has not so bad UI… Portainer is wholly on another level. Thing that attracted me the most is web ui. It gives me flexibility to deploy containers using any system in my home rather than jumping through hoops to access web portal of QNAP. Of course I could just be using docker over CLI but for that I need to enable SSH to my NAS… which something I would rather not do.
Creating containers using Portainer is simple. Just log into app and connect to your environment (usually it’s just local). In the menu left side, select “Containers”. And select “Add Container”. This will load up page where we add details about container that we need to create. For this test purpose, I will use CyberChef (if you don’t know, it is collection of handy web tools that you can “bake” to make it do different things… like say generating encrypted password based on some algorithm or two).

Setup is pretty straight forward…
#1, Name is name that you want to use for your container
#2, Image is image that you want to use to deploy as container.
#3, Search docker hub by clicking on “search” button if you don’t know name of image. This will actually open up separate window in browser for Docker Hub repository. This is 101 level post, so not going into more details about usage of custom repository
You also have option to weather to choose always pull latest image or not… useful if you want to update it to newer version.

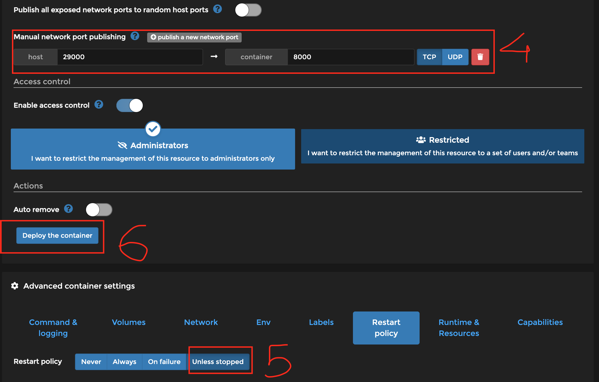
#4, On same page other option is to set port used by app. This image uses 8000 port internally so container port has to be 8000 (this information is available on docker hub page for this image). And host port can be whatever port you want to use (make sure it is free). Here you have option to let Portainer randomize exposed ports… but I personally prefer to have more control over what ports are used on Host side so I generally don’t use that option.
#5, you can decide what to do with this container if docker service restarts. I generally select “Unless Stopped” option to be safe because if I have a container running, I would want it to be available after docker or computer restart as well.
#6 Once happy with all setup, time to deploy the container. Depending on size of image, speed of your internet connection and position of moon it can take few minutes once you click on that button. Portainer makes is obvious by disabling that button while it is actually deploying container.
If everything is good, you will see success message and your container running…

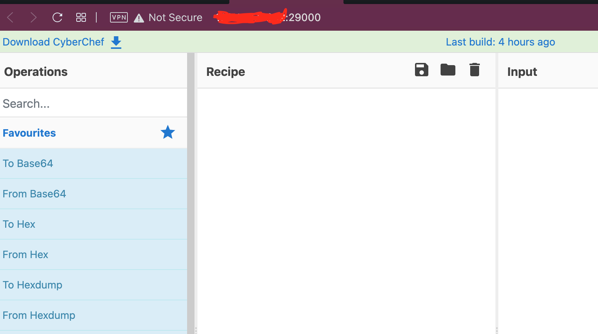
So if you go to http://yourdockerhost:29000 you will see that app is running and ready for use !!

This is it !! As you see, Docker CLI is cool n all… but Portainer is really noob friendly for deploying containers (exactly opposite to what I wrote in last line of previous post :D).
That’s it for now …