I have been using Proxmox on couple of older but decent enough laptops. But as I started to expand my “homelab”, I ran into issue where my local storage is getting low because space is main issue in these old laptops. Since I got QNAP NAS, I decided to add share just for Proxmox nodes. What really neat about this approach is, I am sharing same network share between couple of nodes so they can share their backups. And one of them decide to go belly up, I can simply restore VMs \ Containers from that node to another node.
This is what I did to make it work… (thing to note is I followed below steps for QNAP, if you have different brand of NAS they will be little different).
First step is to create dedicated user. I hate to use same user mainly because in my mind it is a security risk to use same user (which happen to be NAS admin) to share it between machines, my home users (read my wife :D), 3rd party apps etc.
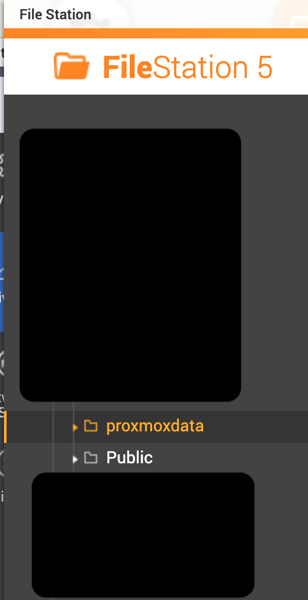
Second step is to create shared folder. This is actual network share that will be added to Proxmox nodes. Give read/write permission for this folder to user created in above step.
 Third step is to make sure you have enabled NFS, CIFS. For that go to control panel in QTS. Then go to “Network & File Services”. From there enable “Microsoft Networking”, “Apple Networking” and “NFS Service”. Chances are you already have it enabled.
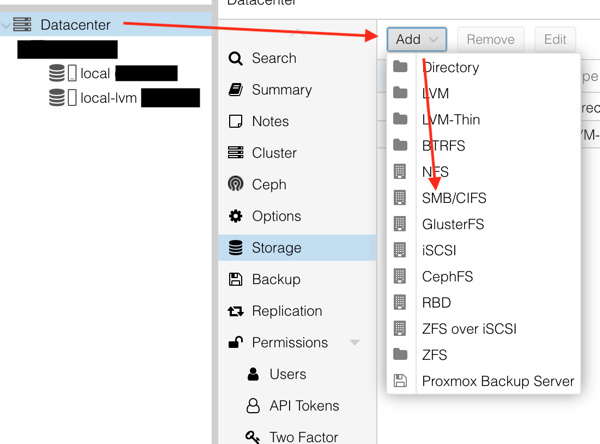
Fourth step is to log into Proxmox node, select “data center”. From there select “Storage”. Then click “Add”, this will list all available options that can be added as storage.

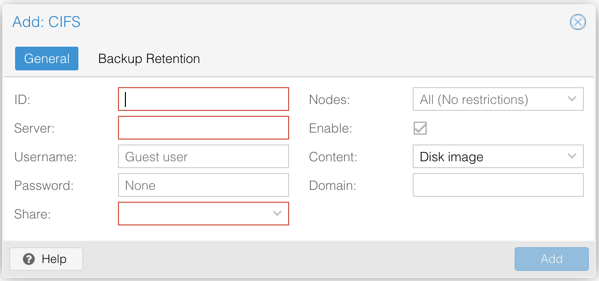
From there select SMB/CIFS. This will pop uo configuration form to add CIFS.

All options are pretty simple to follow…
ID is name that you want to give to this proxmox share
Server is IP of your share (official document recommends IP instead of name for quick response)
Username is user name to access share. Here feed user created in 1st step.
Password is password for that user. Here feed password for user created in 1st step.
If all other information is proper, clicking on SHARE will actually list share accessible by that user on server. From there select share you want to use for Proxmox.
Content is an interesting option (and not very obvious that it is actually multi select box instead of single select), I selected all options because I will use that share for everything.
Domain can be left empty if not used.
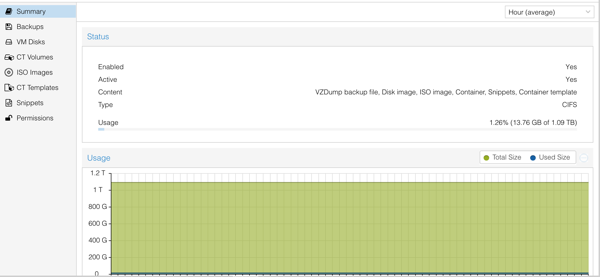
Once selection is done, click “Add”. Within few seconds you will see new share ready for use by Proxmox.

WIth this, your new storage is ready use !!
That’s it for now.