Few months ago, I finally got NAS at my home. It is something I wanted to buy for very long time but was always torn between make my own using truenas or get prebuilt (among others) like QNAP or Synology. I was able to get QNAP TS-453D 4G version. My main purpose to get this NAS was add more features in homelab using containers at same able to hoard data. For which this NAS is perfect because it has dual NIC with 2.5GbE speed and I also upgraded it to 16GB of memory.
Ok enough babbling, this post is about creating Portainer-CE container in QNAP Diskstation. Actually it is pretty straight forward process… or at least that’s what I thought.
So fire up Container Station in QTS. Container Station interface is simple to navigate. Just go to Create and searched for “Portainer” and I found Portainer-CE image (btw, CE stands for Community Edition… a free offering of Portainer).
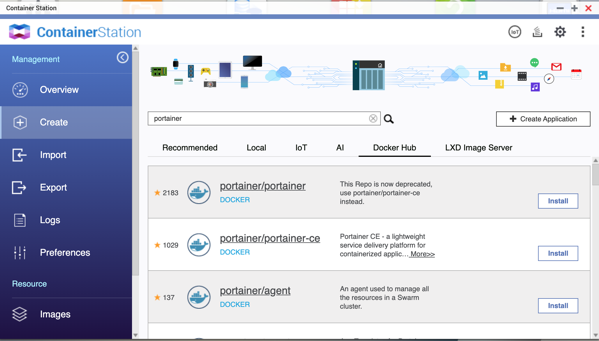
Clicking INSTALL will show available image versions for download. You can simply go with latest version or choose specific version. I just went with latest version.
Once image is downloaded next step is create container. You can select whatever options you want to setup. Once satisfied with choice click CREATE.
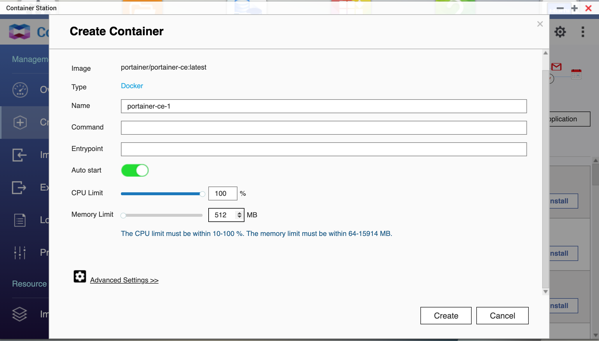
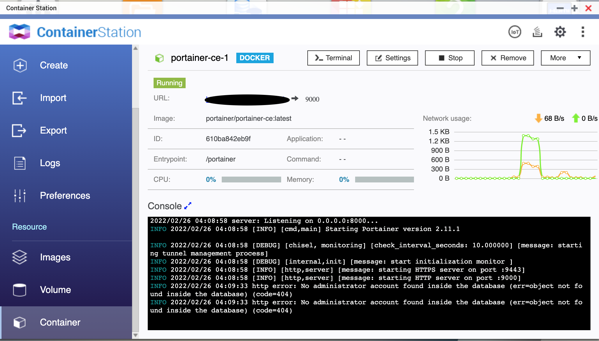
And just like that, it will setup working container with Portainer CE… or at least that is what I thought.
And I was so wrong about it … when I logged into Portainer after initial setup, I found that it was not able to connect to local environment… which means I can’t do anything with this instane !!!
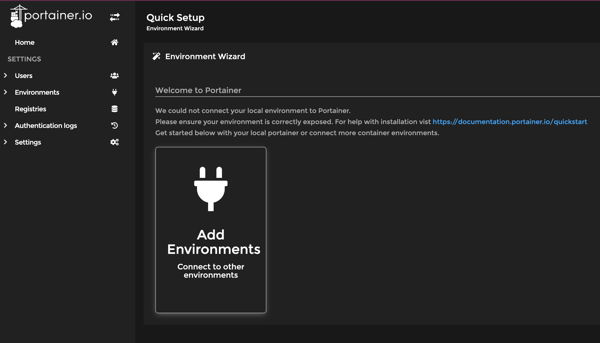
I was so confused (I am still a noob when it comes to Docker, I find that LXC\LDX are more easy to use in Proxmox), till I found that in order to it to work it need to have access to docker.sock file of docker installation. Docker.sock being main entry point for docker to host, it understandably made sense to me that Portainer need access to this file so it can control that environment. So after spending about an hour with different tries (read Googling :D)… and fix is to create container using SSH !!
First I had to enable SSH to my NAS (I’ve disabled services that I am not using).
Then I had to create temp admin account because you can’t use 2fa.
Then SSHed to my NAS and ran following command,
docker run -d –restart=unless-stopped -p 9999:9000 -v /var/run/docker.sock:/var/run/docker.sock –name myPortainer portainer/portainer-ce:latest
Basically above command creates container called myPortainer based on Portainer-CE image.
-p maps port 9999 of docker host to 9000 used by Portainer
-v /var/run/docker.sock:/var/run/docker.sock is start of the show, as that guy maps my docker.sock used by system to Portainer setup
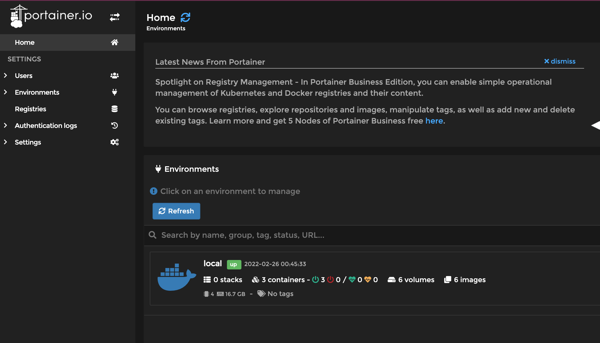
Once command finishes, it was able to create proper environment and was able to access local Docker instance.
TL;DR don’t use GUIs to create containers… CLI is always better approach, no matter what you are doing.
That’s it for now…