Ok, few weeks back I posted how to create a fixed width file using SSIS for test purposes. Then after that I posted TSQL way to import it into database, and now today I am going to show how to import it using SSIS package… I have used same database (which I used to generate file) and same file (generated using SSIS package) for this demo because … well because I can ![]() .
.
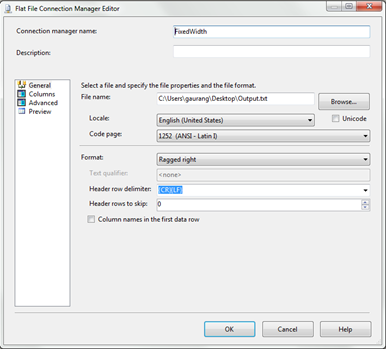
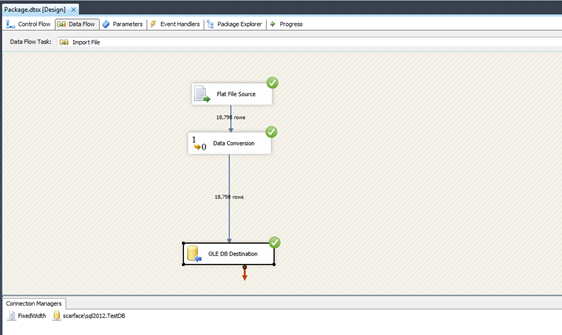
First step is to fire up VS 2010 with SSDT and create new SSIS project. And then select data flow task and drag it to control flow tab. Open up data flow task and select “flat file source” as source of data and drag it to data flow task work area. This will open up connection wizard which you will use to configure flat file source.
For those who don’t know what flat files are … they are just a txt or csv files. They could also be fixed position files. All of them uses some kind of row and column delimiter to separate data within them
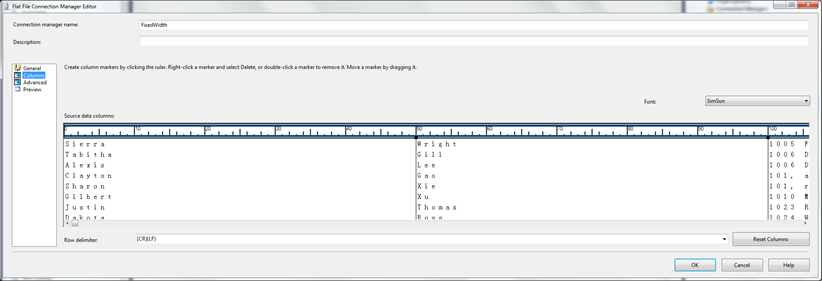
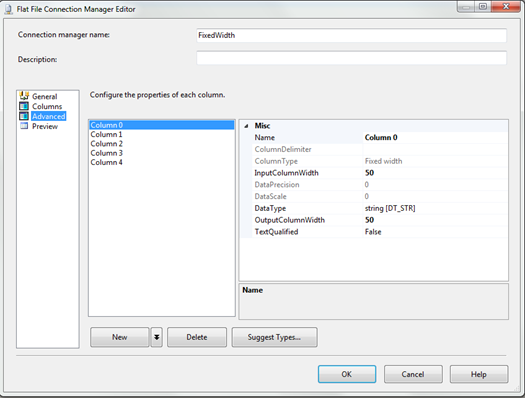
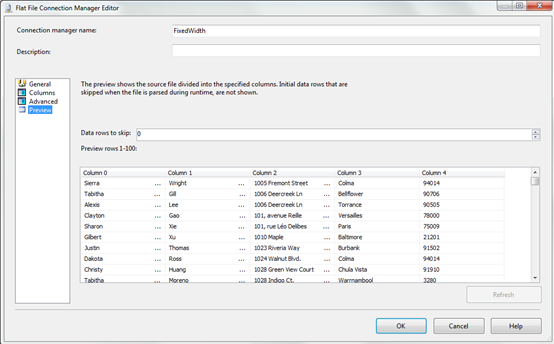
Since it is fixed position file, you have to manually set size of each column. This could be a bit confusing if you are doing it for first time. To define column width, just click on area where data is displayed it will create a dividing line and then drag that line as you need it … repeat same process to define width of all columns. But if you already know width of all columns then there is an alternate easier way can be used to define columns. Select “Advanced” tab (tab below COLUMNS) and click on “New” to create new column and in it’s properties, InputColumnWidth and OutputColumnWidth set width of column. And repeat this step for all columns. From screenshots you can see that I am being lazy and not naming columns properly ![]()
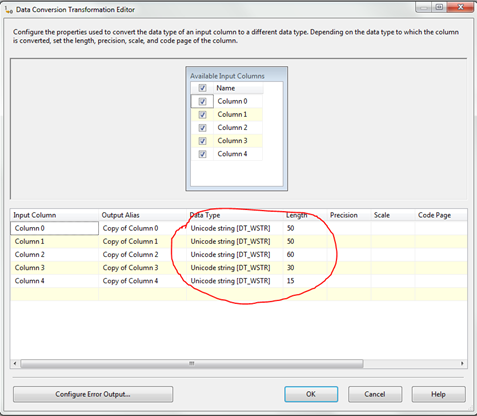
Now, by default output from flat file will be Unicode which we can use as nvarchar data type in table, but I have created table with varchar data type, so we need to use data conversion task to convert data type. For that just drag the control to data flow area and connect output of flat file to data conversion task. You can configure data conversion task by double clicking on it, then select input column and output column alias … and data type of output.
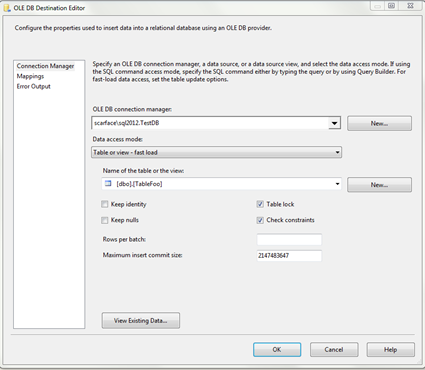
Once that is done, last step is to add destination … which is SQL Server 2012 database. For that you can either use OLD DB Destination or SQL Server Destination. I like to use OLD DB destination because of my habit of using it in .net ![]() . So just drag n drop OLD DB Destination task and it will pop up wizard for configuration. Since I had used same table in my previous post to create this flat file, I already had a table with required columns. But there is an option to create table if you don’t have that table.
. So just drag n drop OLD DB Destination task and it will pop up wizard for configuration. Since I had used same table in my previous post to create this flat file, I already had a table with required columns. But there is an option to create table if you don’t have that table.
Once everything is connected and is not showing any signs of error (if there is any error in configuration it will show up as an exclamation mark or error sign) run the project and it should import all files from that flat file to database table.
That’s it for now …
It’s Just A Thought … ![]()

