After my recent discovery of this great virtualization tool, everyday I am getting amazed by all features this software has and I am learning something new everyday. Just like any other hypervisor, in order to create VM (or container) it needs source in form of ISO file. The way Proxmox works is, it stores these ISOs or resources (in case of LXC Container) in some specific location. And this post is about how to upload those files so you can use them to create VMs in Proxmox.
Method 1: Upload files using GUI
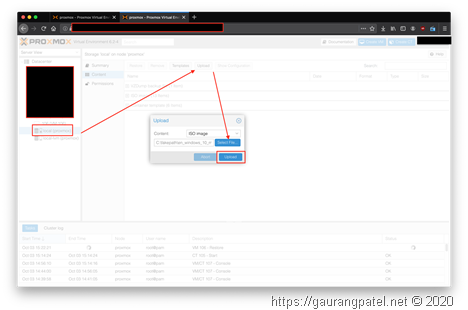
So this is obviously simpletest method to upload files to your Proxmox server. You can do that by going to LOCAL storage. From there click “upload” and browse file that you want to upload.
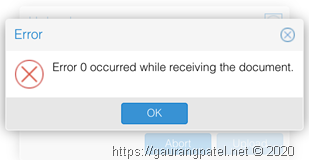
This method is all good for smaller files. But for some reasons, if file is too big (honestly I don’t know what size it is expecting) upload process will fail after some time with following error…
Using GUI to do things always bothers me (may be I am too old school about it). Main because GUI just doens’t give all details about what it is doing in background and I like that know what is happening. And also, if for whatever reasons GUI way craps out generally it is more difficult to troubleshoot (like what you see in Method 1). So there are 2 other ways you can copy\upload files to your Proxmox server.
Method 2: Using Secure Copy (SCP)
This method is nothing new. It is very standard way to copy files to Linux systems and if your host is also Linux or MacOS (as SCP is just varient of similar tool used in BSD) you can use this option.
Use following command (with your paths) to upload ISO file (container template files goes to different location).
scp –v iso_file_name.iso proxmoxLogin@IP_of_Proxmox_Server:/var/lib/vz/template/iso
I frequently use this command to copy file to my Proxmox servers. But only downside for me is it takes a while to copy file over wifi and also you have to keep your machine ON in order to push files across. This brings to my most favorite option to copy ISOs.
Method 3: Using WGET
Wget is actually a program that can be used to get files over http, https or ftp protocol. And this program has been ported to most of OSes This option allows you to download file directly from Proxmox server and very convenient way because this directly downloads files to your server without need to keep your client connected.
Main and probably only thing you need to download ISO of your favorite Linux distro is full download path that you feed to wget command.
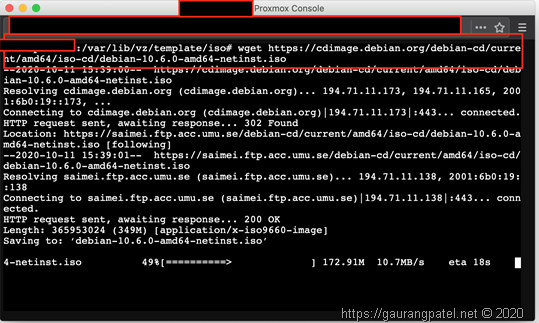
In order to download file, start shell of Proxmox server (or just make ssh connection to server). Then navigate to folder where ISO files are expected to be, which is /var/lib/vz/template/iso. There just type in,
wget path_of/where/ISO_is/locatedOnline.iso
for example, if I wanted to download minimalistic version of debian then I would use
wget https://cdimage.debian.org/debian-cd/current/amd64/iso-cd/debian-10.6.0-amd64-netinst.iso
This will download ISO file ready to be used next time when you need to make VM using that… pretty convenient (and fast) if you ask me.
This concludes my post about “How to upload files to Proxmox for VM”.
Stay safe … ![]()


